As of 2023, Vietnam eVisa is the only visa option available for travelers to Vietnam. Vietnam introduced its eVisa in 2017. Started as a pilot program with just a handful of countries, today Vietnam eVisa is available for all nationalities.
After the pandemic, Vietnam discontinued its Visa on Arrival (VOA) option. That means the eVisa is the only Vietnam visa option available for tourists.
Vietnam eVisa can be single-entry or multiple-entry and valid for a maximum of 90 days. You must enter and exit Vietnam within the validity of the eVisa.
Table of Contents
***
Nationalities eligible for Vietnam eVisa
All nationalities are eligible to apply for Vietnam eVisa. Previously it was available for 80 nationalities. Since 15 August 2023, Vietnam eVisa is available to all nationalities.
***
Passport validity required for Vietnam eVisa
Your passport must be valid for at least 30 days beyond the validity of your Vietnam eVisa. Add 30 days to the expiration of your eVisa to calculate the passport validity required.
***
Vietnam eVisa validity
Vietnam eVisa is issued for a maximum of 90 days. You must enter and exit Vietnam within the validity of your eVisa.
When you arrive in Vietnam, the immigration officer will stamp the date on your passport by which you must leave Vietnam. This date is usually the same as your eVisa expiration date.
To get the most out of your eVisa, enter on the first day of your eVisa or at least as soon as your eVisa validity begins. Leave on the last day of your eVisa or at least as close to the expiration date as possible.
***
Documents needed before filling out the application
Before starting your Vietnam eVisa application, have these documents ready.
- Original passport
- Passport must be valid for at least 30 days beyond the validity of the Vietnam eVisa
- Digital portrait photo with the following specifications
- Photo must show the entire face
- Photo must be straight-looking without glasses
- Photo must be about 4 x 6 cm in dimensions
- Photo must be in JPG format only
- Photo or scan of your passport data/ID page
- Photo or scan must show all details including photo, personal details and the machine-readable ICAO line
- Photo or scan must be in JPG format only
- A credit or debit card for visa fee
***
Word of caution on Vietnam eVisa scams
There are many fake Vietnam eVisa websites on the internet charging over $100 USD for eVisa. Reputed visa agents are also charging astronomical prices. Do not fall prey to these websites.
There is ONLY ONE OFFCIAL Vietnam eVisa website. The URL is below.
OFFICIAL Vietnam eVisa website: https://evisa.xuatnhapcanh.gov.vn/web/guest/trang-chu-ttdt
***
Steps to apply for Vietnam eVisa
Follow the below steps to fill out the Vietnam eVisa application.
Start
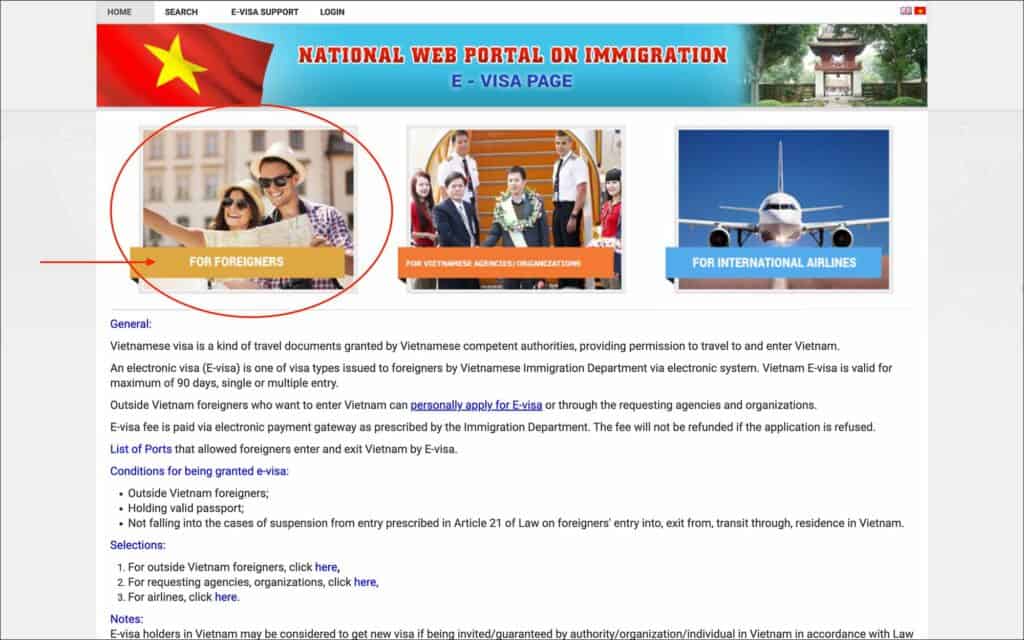
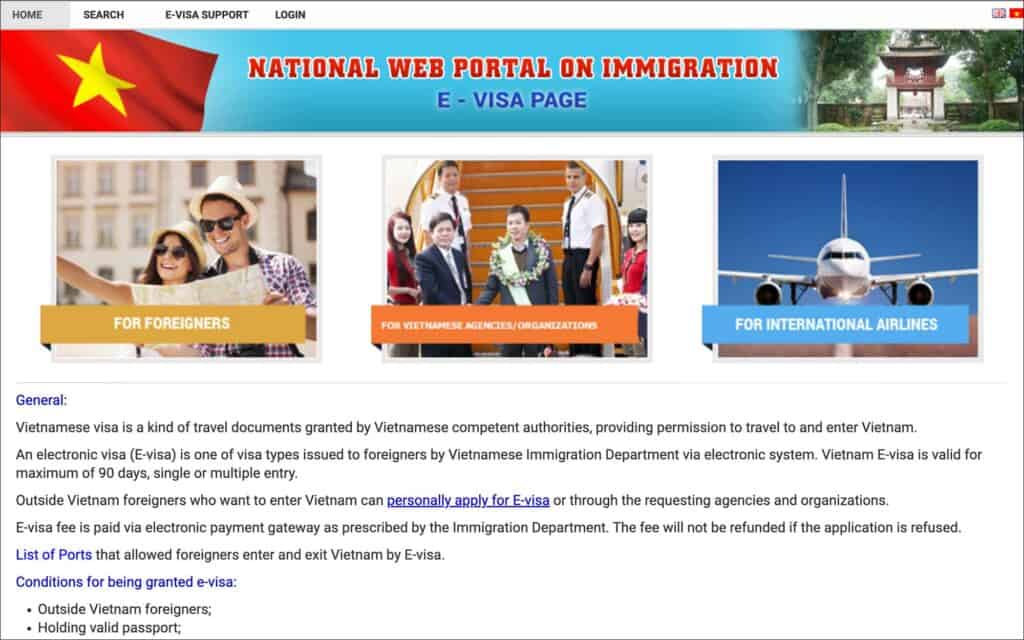
- Go to the Vietnam eVisa Portal
- Click on “FOR FOREIGNERS”
You will be taken to the “For outside foreigners personally applying for E-visa” page.
—
Instructions

Read through all the instructions on this page.
When finished, check the box for “Confirmation of reading carefully instructions and having completed application”.
Click on the “Next” button.
You will be taken to the “Fulfill foreigner’s information” page.
—
STEP 1: Fulfill foreigner’s information
Section: FOREIGNER’S IMAGES
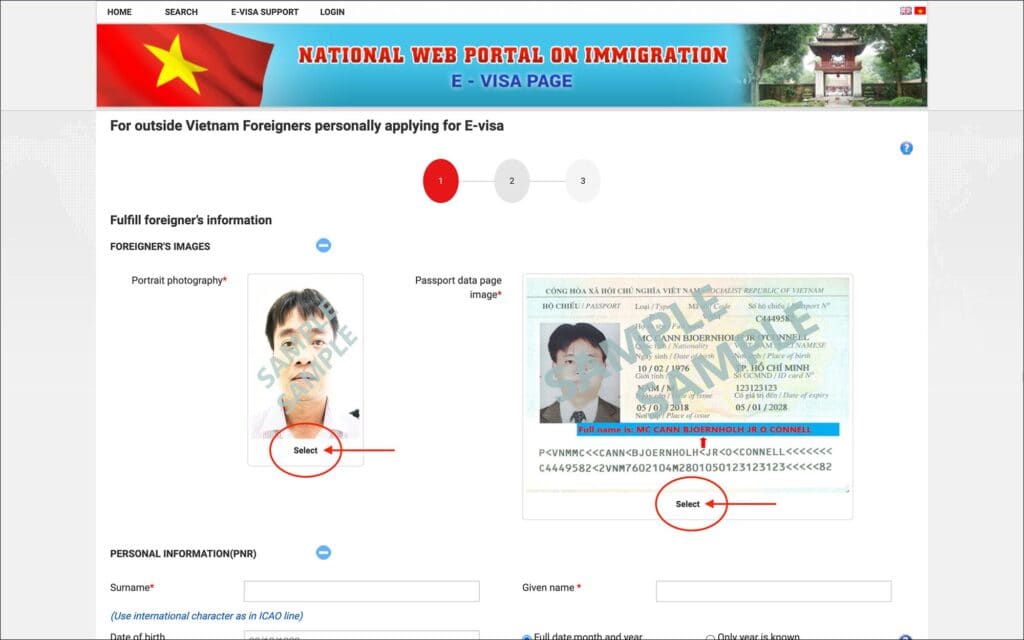
Upload the following in the “Foreigner’s images” section.
- Portrait photography [Comment: Click anywhere on the sample photo or on the “Select” button to upload a digital passport-size portrait photo]
- Passport data page image [Comment: Click anywhere on the sample passport image or on the “Select” button to upload a scanned copy of your passport ID page]
Section: PERSONAL INFORMATION (PNR)
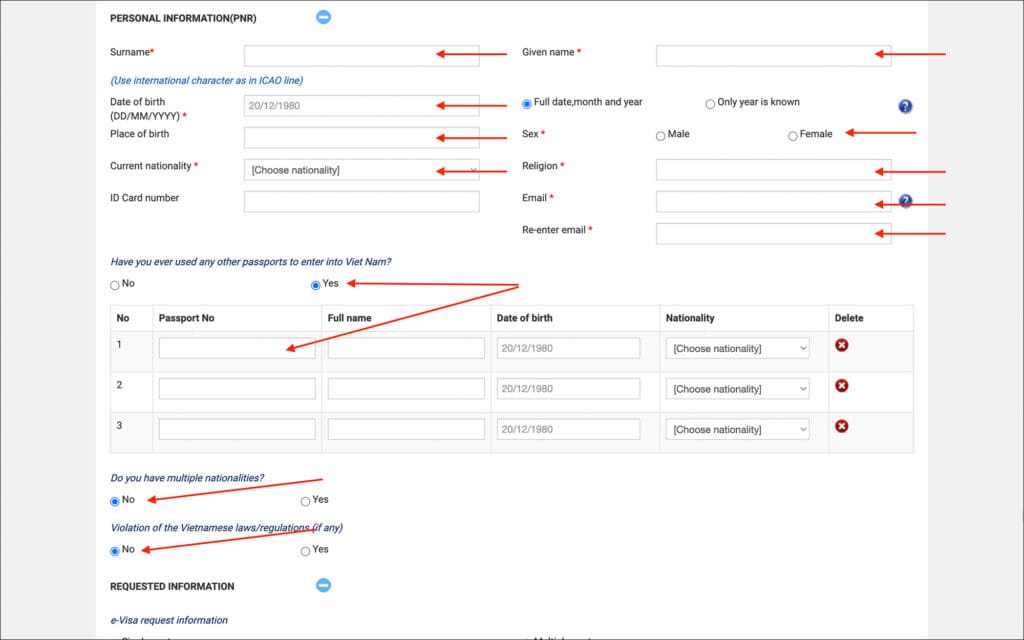
- Surname [Comment: Enter your surname as it appears in your passport]
- Given name [Comment: Enter your given name as it appears in your passport. If you have a first name and middle name, combine them together and enter them here]
- Date of Birth (DD/MM/YYYY) [Comment: Enter your date of birth as it appears in your passport in DD/MM/YYYY format]
- Place of Birth [Comment: Enter your place of birth as it appears in your passport]
- Sex [Comment: Select male or female from the options]
- Current nationality [Comment: Select your current nationality, i.e. country of your passport]
- Religion [Comment: Enter your religion]
- ID Card number [Comment: This is a non-mandatory field, so you can leave this blank or simply enter your passport number]
- Email [Comment: Enter your email where you would like to receive your approved Vietnam eVisa]
- Re-enter email [Comment: Re-enter your email to confirm]
- Have you ever used any other passports to enter into Viet Nam? [Comment: Select “No”. If you have used an old passport to enter Vietnam before, select “Yes” and enter the details]
- Do you have multiple nationalities? [Comment: Select “No”. Select “Yes” if you have multiple nationalities]
- Violations of the Vietnamese laws/regulations (if any) [Comment: Select “No”. Select “Yes” if you have violated any Vietnamese laws previously]
Section: REQUESTED INFORMATION
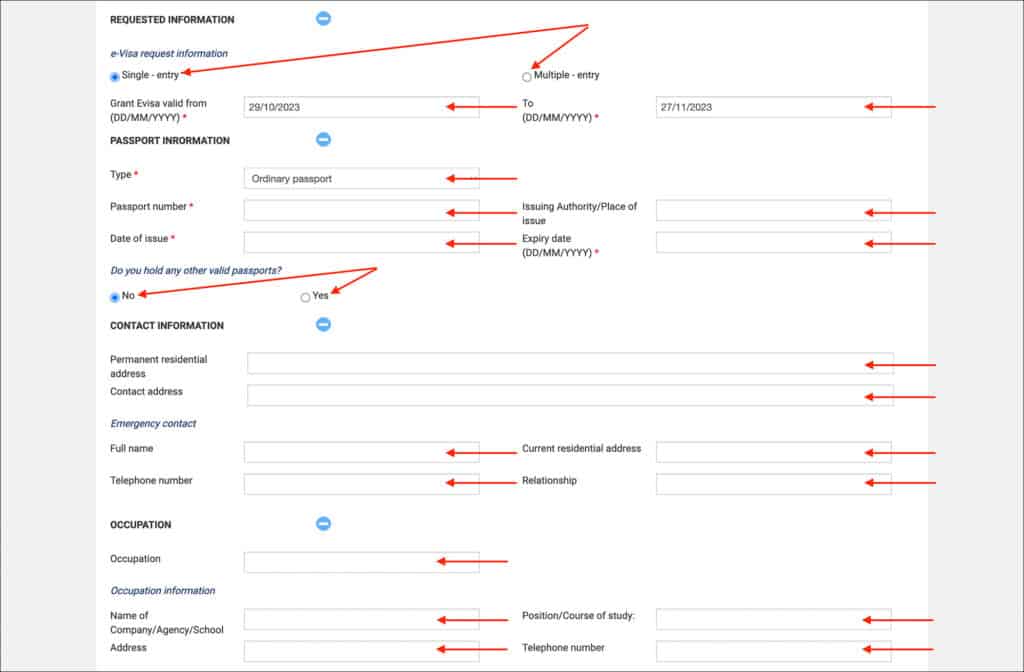
- E-Visa request information [Comment: Select single or multiple entry]
- Single-entry
- Multiple-entry
- Grant Evisa valid from (DD/MM/YYYY) [Comment: Enter your expected date of arrival in Vietnam in DD/MM/YYYY format. Your eVisa validity starts from this date]
- To (DD/MM/YYYY) [Comment: If you know your date of departure, then enter the date here. Otherwise, leave it as is. There is a question later in the form on the validity of eVisa and this field gets auto-populated based on the days you enter in that field]
NOTE
The above fields “Grant Evisa valid from” and “To” are redundant and confusing. The information you enter in these two fields is overridden later by fields within the “INFORMATION ABOUT THE TRIP” section. So leave these two fields as is for now and continue. They get populated correctly when you get to the “INFORMATION ABOUT THE TRIP” section.
PASSPORT INFORMATION
- Type [Comment: Select “Ordinary passport” from the list]
- Passport number [Comment: Enter your passport number]
- Issuing Authority/Place of issue [Comment: Enter the issuing authority as per your passport OR enter the country of your passport]
- Date of issue [Comment: Enter your passport issue date]
- Expiry date (DD/MM/YYYY) [Comment: Enter your passport expiration date]
- Do you hold any other valid passports? [Comment: Select “No”. Select “Yes” if you hold more than one valid passport and enter the details]
CONTACT INFORMATION
- Permanent residential address [Comment: Enter your permanent residential address]
- Contact address [Comment: Enter your current mailing address]
Emergency contact
- Full name [Comment: Enter your emergency contact’s full name]
- Current residential address [Comment: Enter your emergency contact’s residential address]
- Telephone number [Comment: Enter your emergency contact’s telephone number]
- Relationship [Comment: Enter your emergency contact’s relationship with you. Ex: Wife, husband, father, daughter, etc.]
OCCUPATION
- Occupation [Comment: This is a non-mandatory field. Enter your occupation in general terms]
NOTE: Occupation
To avoid any misunderstandings or political issues, do not mention your profession in a way that sounds like journalism. Ex: writer, blogger, journalist, reporter, press, etc. Use more neutral-sounding professions such as software, marketing, teaching, student, business, housewife, etc.
Occupation Information
- Name of Company/Agent/School [Comment: Enter the name of your company (employer), business, university, etc.]
- Position/Course of study [Comment: Enter your position or title if you are employed or running a business. Enter your course of study if you are a student]
- Address [Comment: Enter the address of your employer, business, university, etc]
- Telephone number [Comment: Enter the phone number of your employer, business, university, etc]
INFORMATION ABOUT THE TRIP
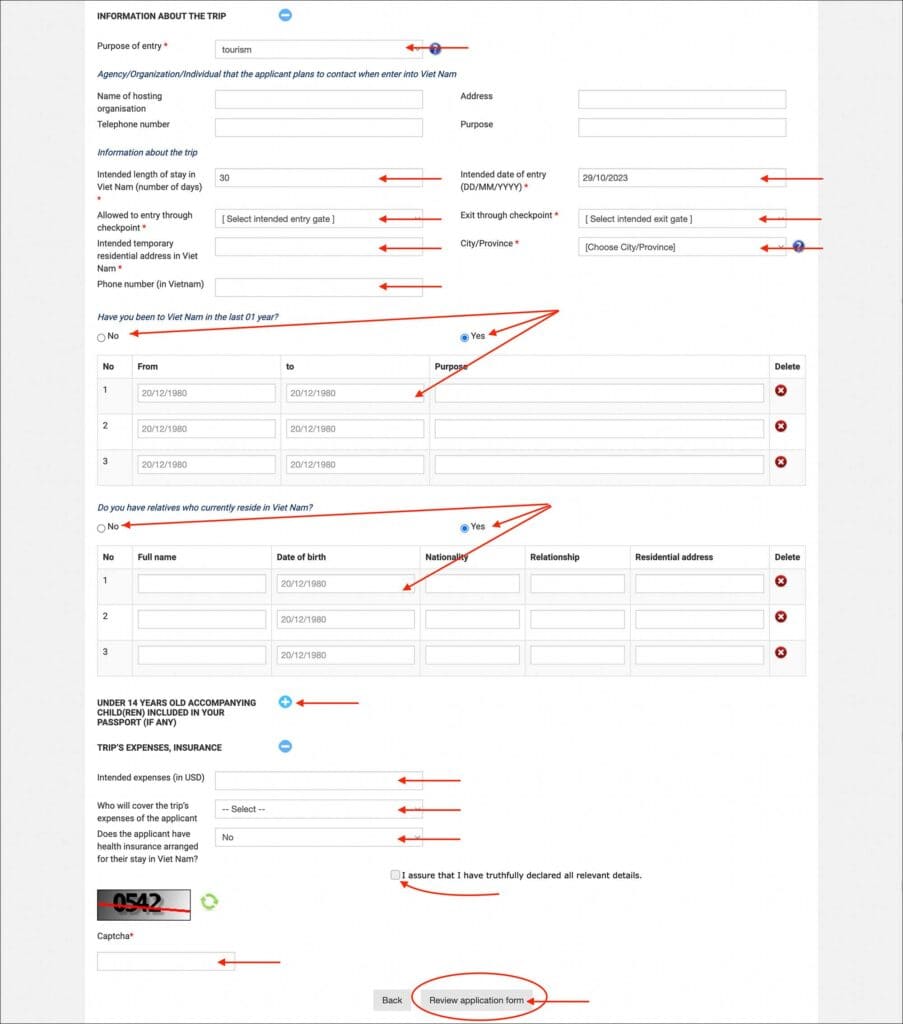
- Purpose of entry [Comment: Select “tourism” from the options]
Agency/Organization/Individual that the applicant plans to contact when enter into Viet Nam
- [If traveling as a tourist, there is no need to enter anything here. If visiting Vietnam for business, enter the necessary details]
Information about the trip
- Intended length of stay in Vietnam (number of days) [Comment: This will be 30 by default. Change it to whatever days you need. Maximum is 90 days. If you want to get a 90-day visa, change this field to 90]
- Intended date of entry (DD/MM/YYYY) [Comment: Enter the date on which you plan to enter Vietnam. This will be the start date of your eVisa. Updating this field will also update the fields “Grant Evisa valid from” and “To” in the REQUESTED INFORMATION section above]
- Allowed to entry through checkpoint [Comment: Select the airport or land border from the options at which you plan to enter Vietnam. This does not matter for the eVisa but airlines may not let you board if your arrival airport is different from the checkout point mentioned in your eVisa]
- Exit through checkpoint [Comment: Enter the airport or land border from which you plan to exit Vietnam. This usually doesn’t matter for eVisa or the airline. You can exit from any airport or land border]
- Intended temporary residential address in Viet Nam [Comment: Enter your hotel address in Vietnam. If you haven’t booked one already, just enter any hotel address. If you plan to book one for the eVisa, I suggest booking a fully-refundable hotel]
- City/Province [Comment: Enter the city/province of your hotel address]
- Phone number [Comment: Enter the phone number of your hotel]
- Have you been to Viet Nam in the last 01 year? [Comment: If you have been to Vietnam in the last 01 year, select “Yes” and enter the details. Otherwise, select “No”]
- Do you have relatives who currently reside in Viet Nam? [Comment: Select “No”. If you have relatives in Vietnam, select “Yes” and enter their details]
UNDER 14 YEAR OLD ACCOMPANYING CHILD(REN) INCLUDED IN YOUR PASSPORT (IF ANY)
Use this section to enter any under-14-year-old children included in your passport. If not, skip this section.
TRIP’S EXPENSES, INSURANCE
- Intended expenses (in USD) [Comment: Enter the amount you plan to spend for this trip including airfare, etc. in USD]
- Who will cover the trip’s expenses of the applicant [Comment: Select “The applicant” if paying for the trip yourself. If someone is sponsoring your trip, select “Other” and enter their details]
- The applicant
- Other agency/organization/individual
- Type [Comment: Select “Cash”]
- Cash
- Credit card
- Traveller’s cheques
- Does the applicant have health insurance arranged for their stay in Viet Nam? [Comment: Health insurance is not mandatory, so you can simply select “No”. If you already have health insurance, select “Yes” and enter details]
After completing the above sections, check the box for “I assure that I have truthfully declared all relevant details”.
Enter the Captcha and click on the “Review application form” button.
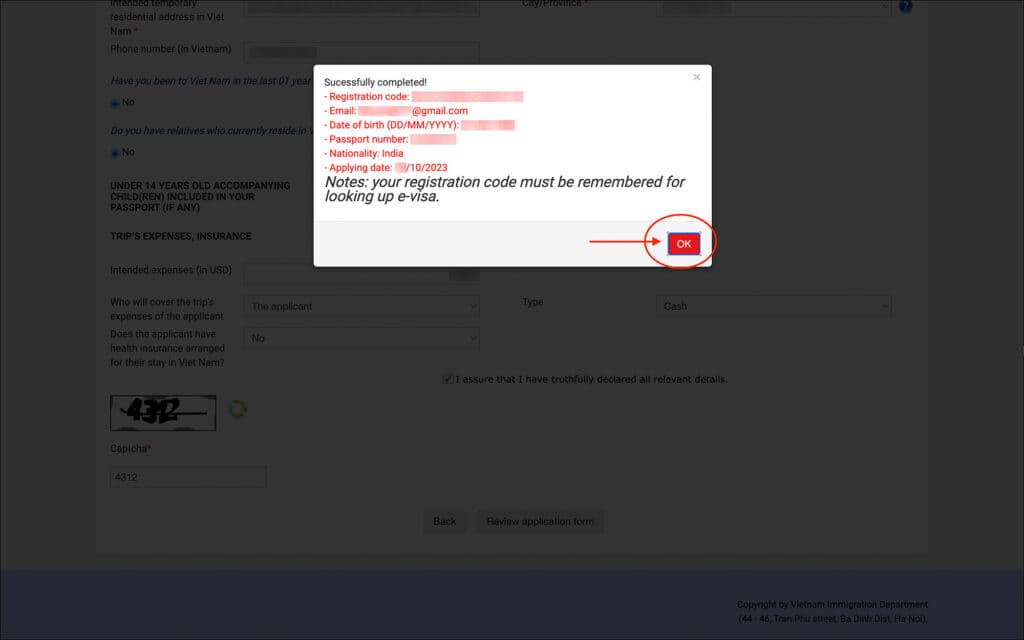
You will be shown a popup with your “registration code”. You need this registration code to look up the status or download your approved eVisa.
Click on the red “OK” button.
You will be taken to the “Review application form” page.
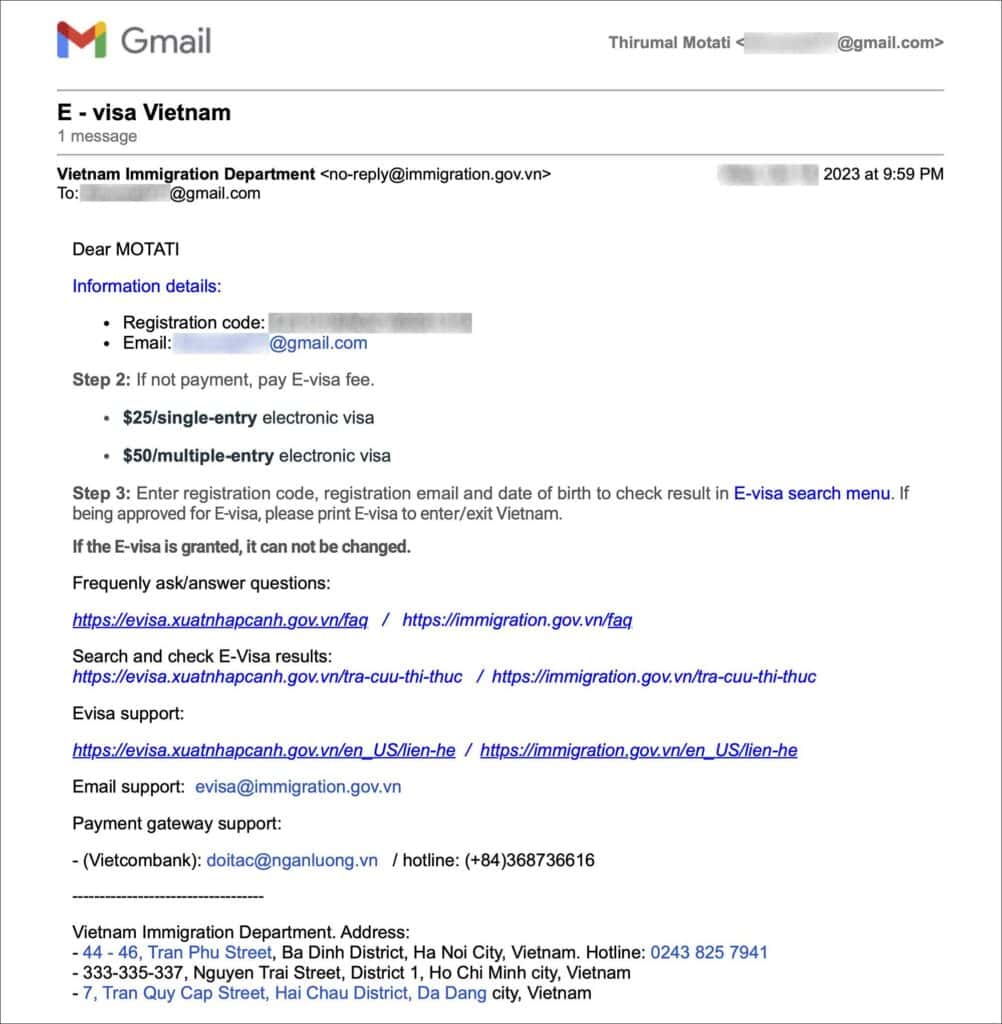
Registration code will also be sent to your email. Save this email or write down your registration code to track the application status.
—
STEP 2: Review application form
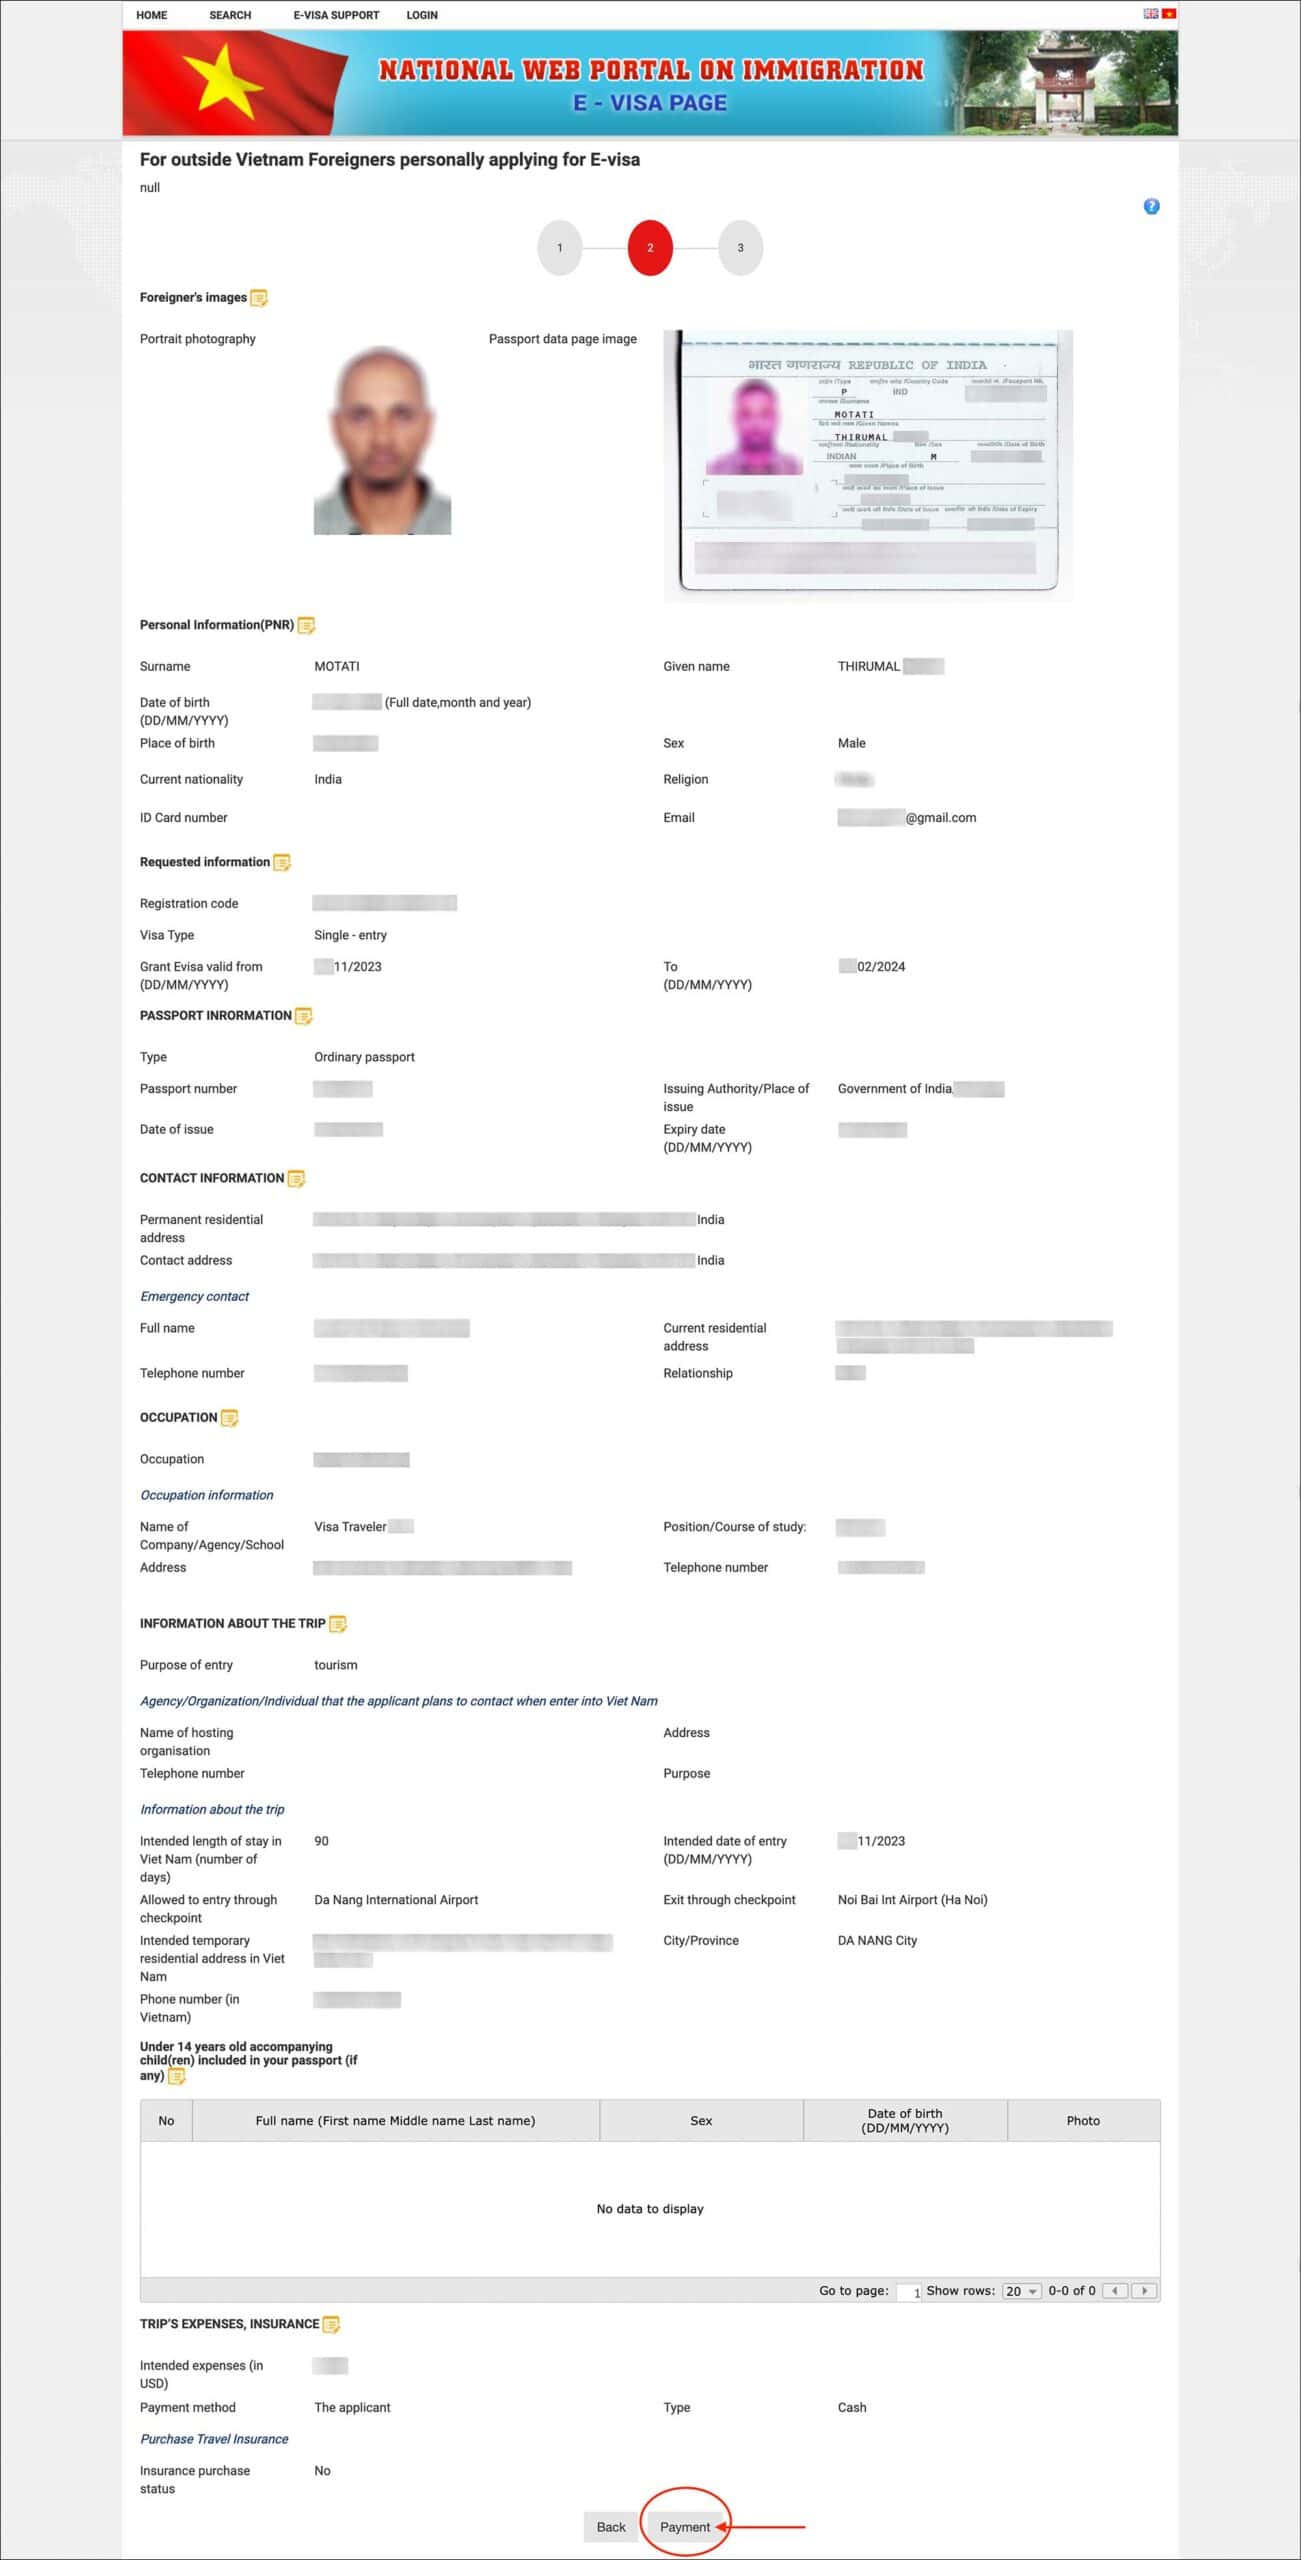
Review all the information you have entered on the previous page. Go through each of the sections to make sure the information you have entered is correct and accurate.
If everything looks good, click on the “Payment” button.
You will be taken to the “payment details” page.
—
STEP 3: Payment details
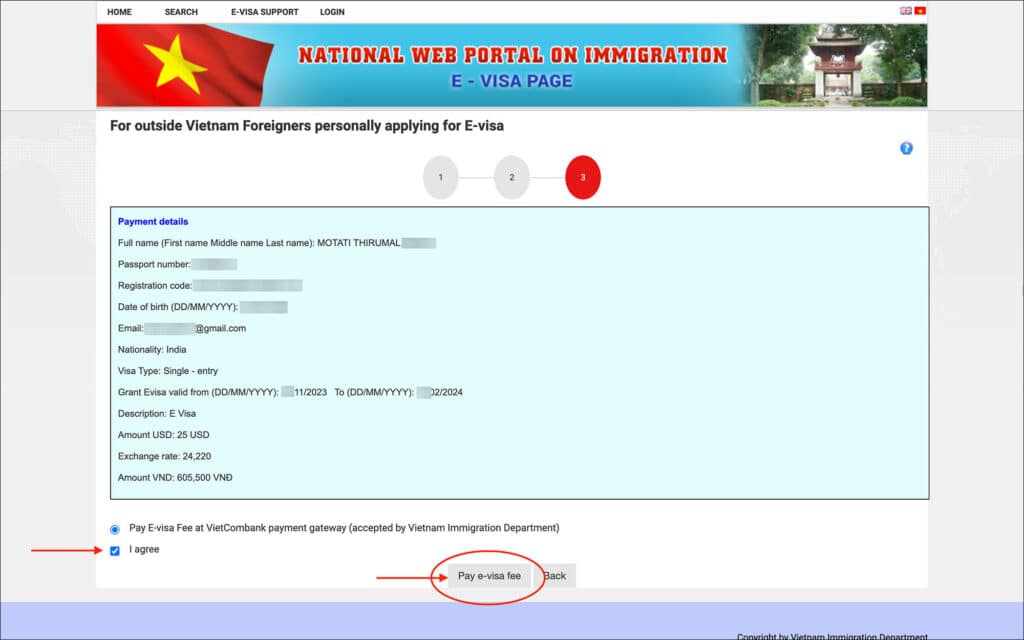
On the payment details page, review your details to make sure they are correct and accurate. You cannot change these details past this step. So take a moment to review them again.
Check the box for “I agree” and click on the “Pay e-visa fee” button.
You will be taken to the “Payment options” page.
PAYMENT OPTIONS
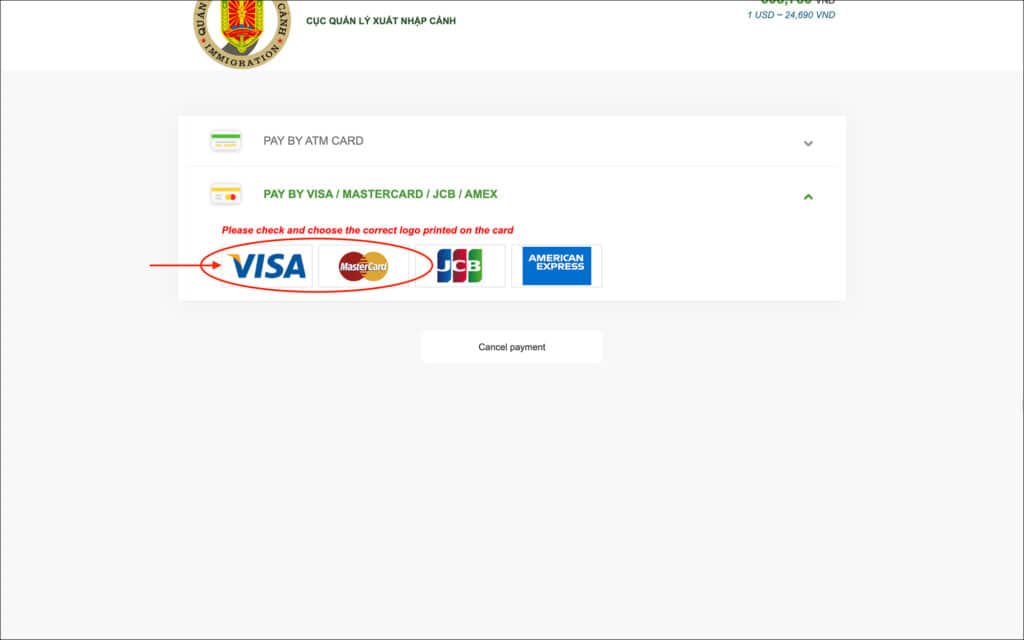
On this page, you will see two options.
- PAY BY ATM CARD
- PAY BY VISA / MASTERCARD / JCB / AMEX
If paying by credit card, click on the “PAY BY VISA / MASTERCARD / JCB / AMEX” option.
Then click on Visa, Mastercard, etc. depending on your credit card.
You will taken to the “PAY BY VISA / MASTERCARD / JCB / AMEX” page.
PAY BY VISA / MASTERCARD / JCB / AMEX
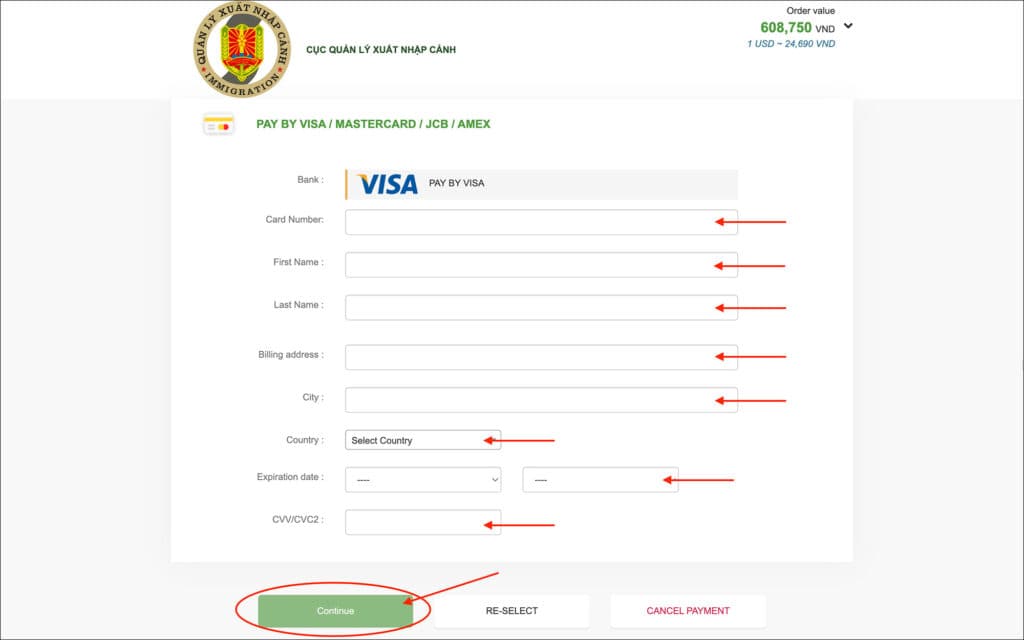
On this page, enter your credit card details and click on the green “Continue” button.
Confirm Popup
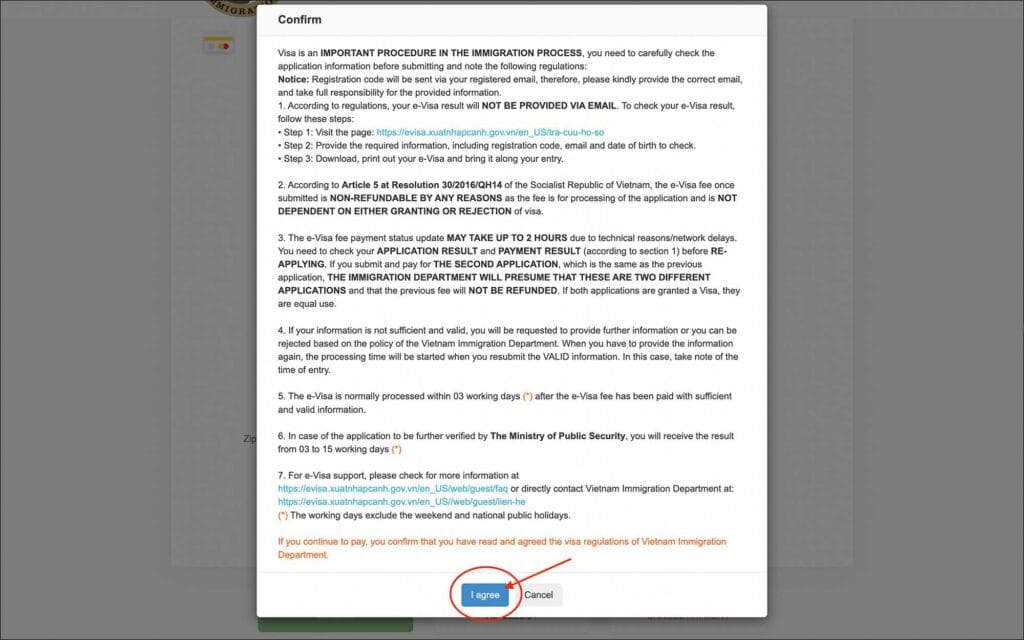
Read through the information on the popup and click on the blue “I agree” button.
You will be taken to the payment success page.
Payment Success
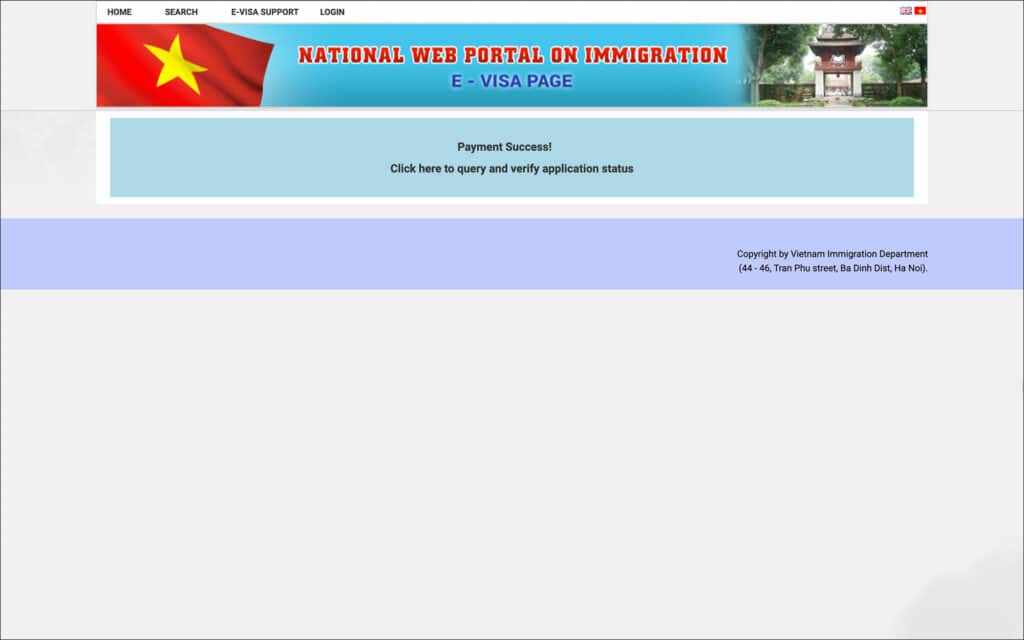
After the payment, you will be taken to the payment success page. This page confirms that your Vietnam eVisa application has been successfully submitted. You can close this window for now.
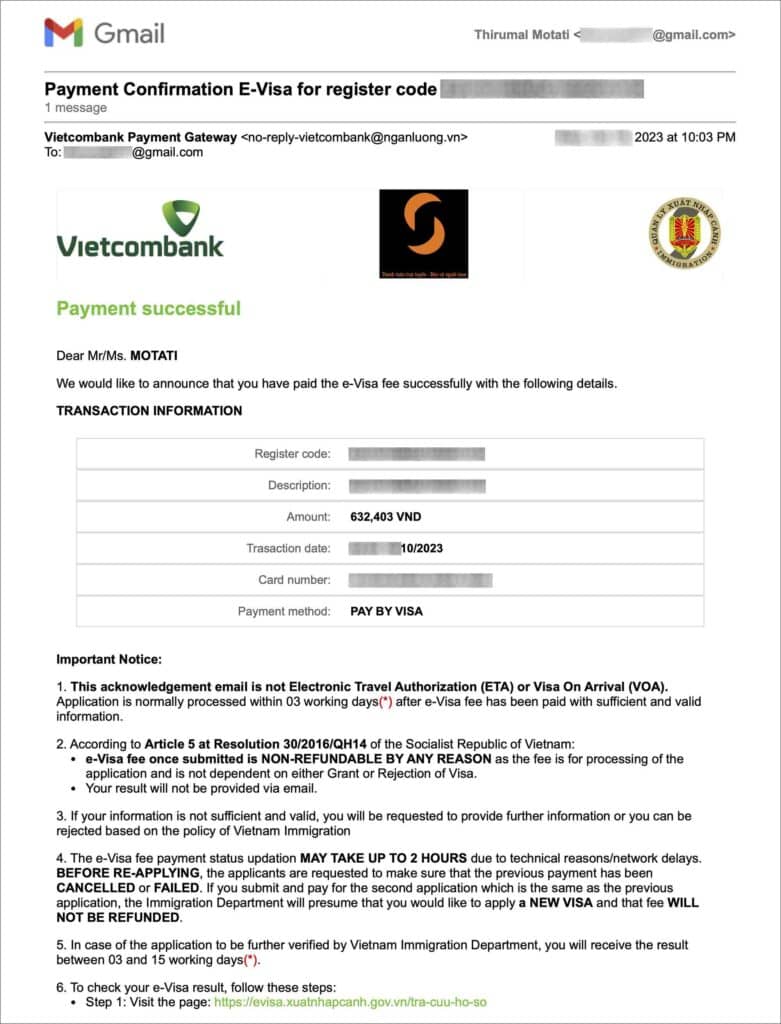
Check your email inbox. You will receive an email notification confirming your eVisa payment and submission.
—
Check Vietnam eVisa status
Vietnam eVisa processing time is 3 working days. You can check your Vietnam eVisa status by following the below steps.
Go to the Vietnam eVisa portal application status page.
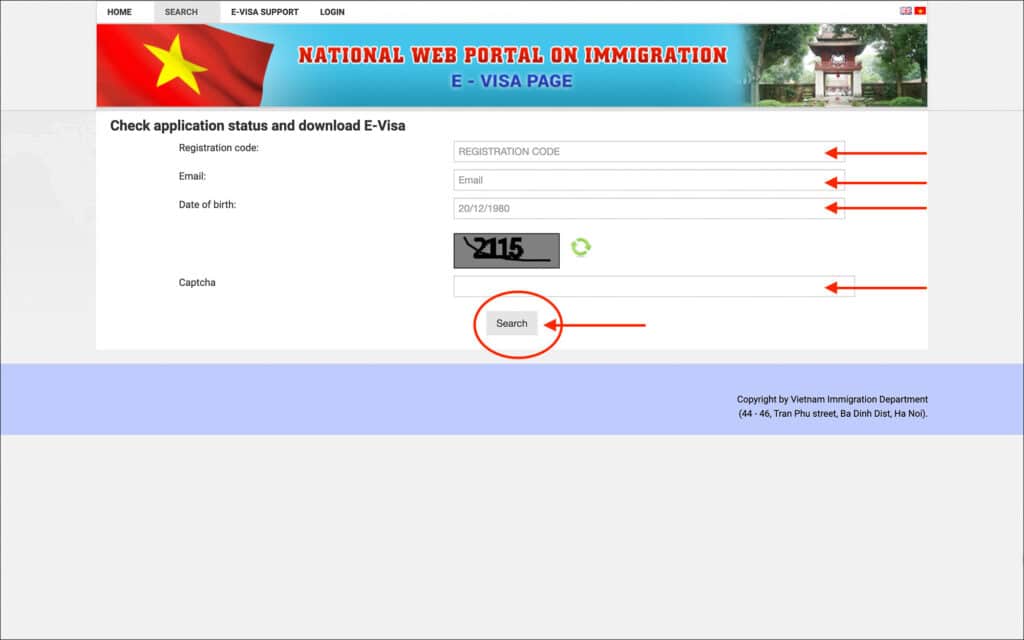
Enter the following details in the “Check application status and download E-Visa” section.
- Registration code [Comment: Enter the registration code of your Vietnam eVisa application. If you don’t remember, check your email]
- Email [Comment: Enter the email that you have used for your Vietnam eVisa application]
- Date of birth [Comment: Enter the date of birth as it appears in your passport in DD/MM/YYYY format]
Enter the Captcha and click on the “Search” button.
Your application status will be displayed right below on the same page.
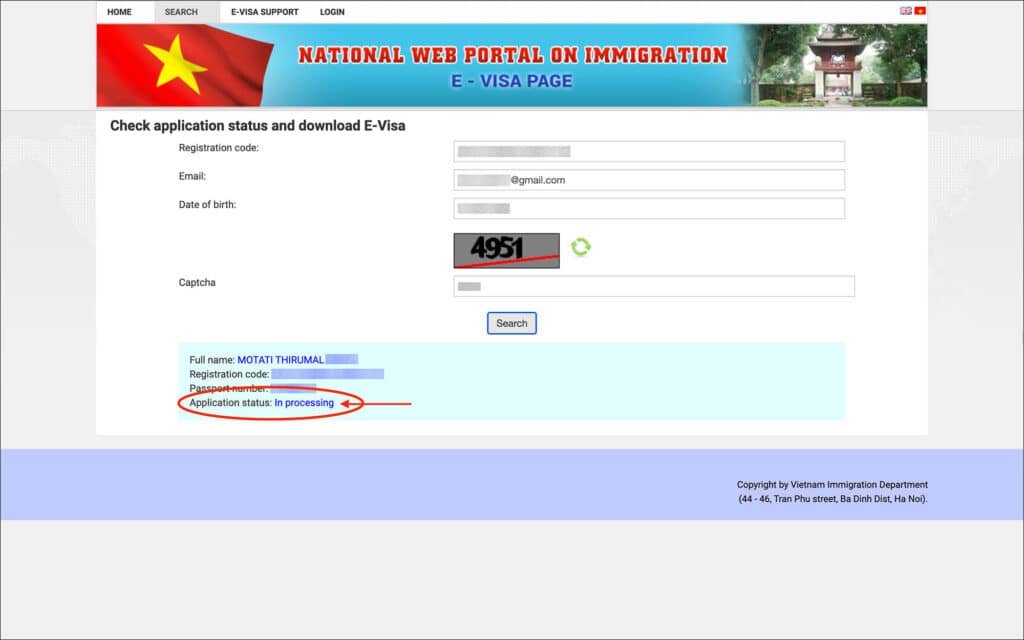
If your application status is “In processing”, then your application is still in process.
If your application is “Granted visa”, then your Vietnam eVisa is approved
—
Download approved Vietnam eVisa
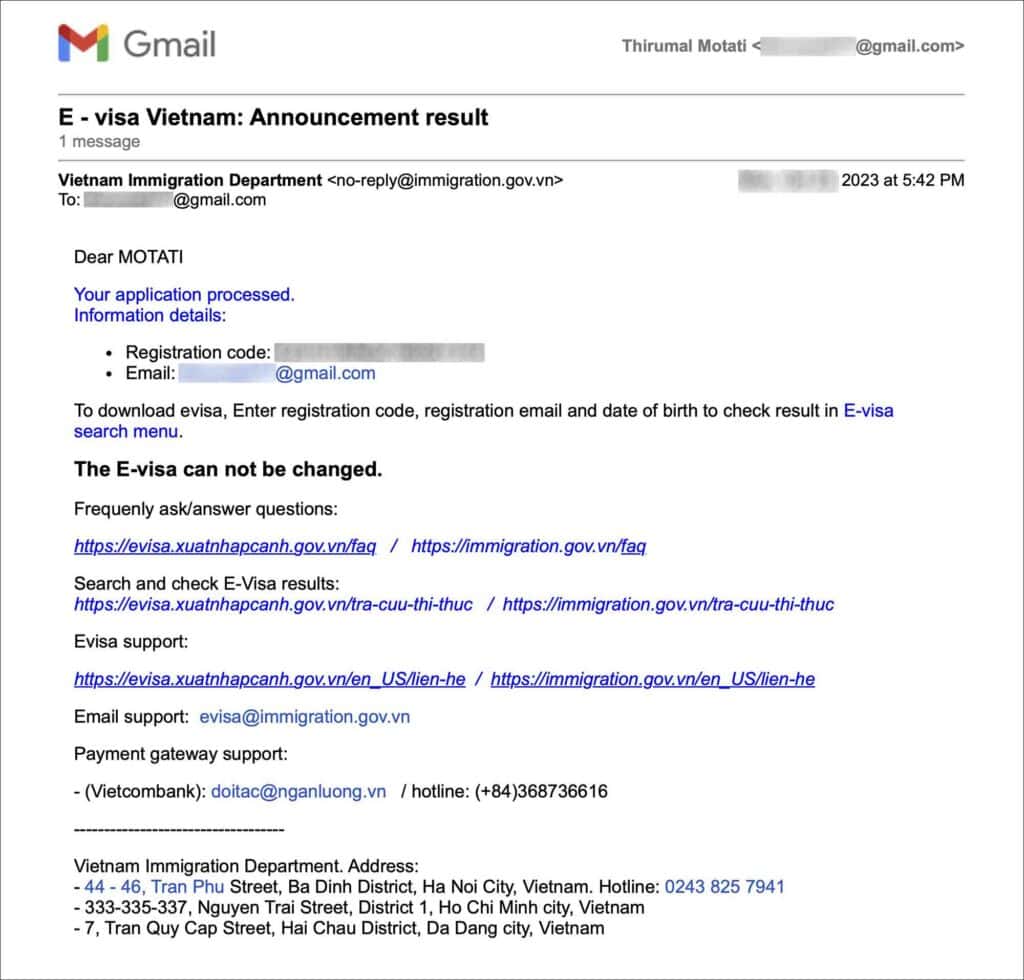
When your eVisa is approved, you will receive an email notifying you that your Vietnam eVisa has been approved.
The subject line or the body of the email does not clearly indicate that your eVisa is approved. Instead, it will simply say “announcement result” or “application processed”. Your approved eVisa pdf will not be in the email either.
You will have to go back to the Vietnam eVisa portal and download your approved eVisa.
Follow the below steps to download your approved Vietnam eVisa.
Go to the Vietnam E-Visa portal application status page.
Enter the following details in the “Check application status and download E-Visa” section.
- Registration code [Comment: Enter the registration code of your Vietnam eVisa application. If you don’t remember, check your email]
- Email [Comment: Enter the email that you have used for your Vietnam eVisa application]
- Date of birth [Comment: Enter the date of birth as it appears in your passport in DD/MM/YYYY format]
Enter the Captcha and click on the “Search” button.
Your approved eVisa details and the button to download the eVisa will be displayed right below on the same page.
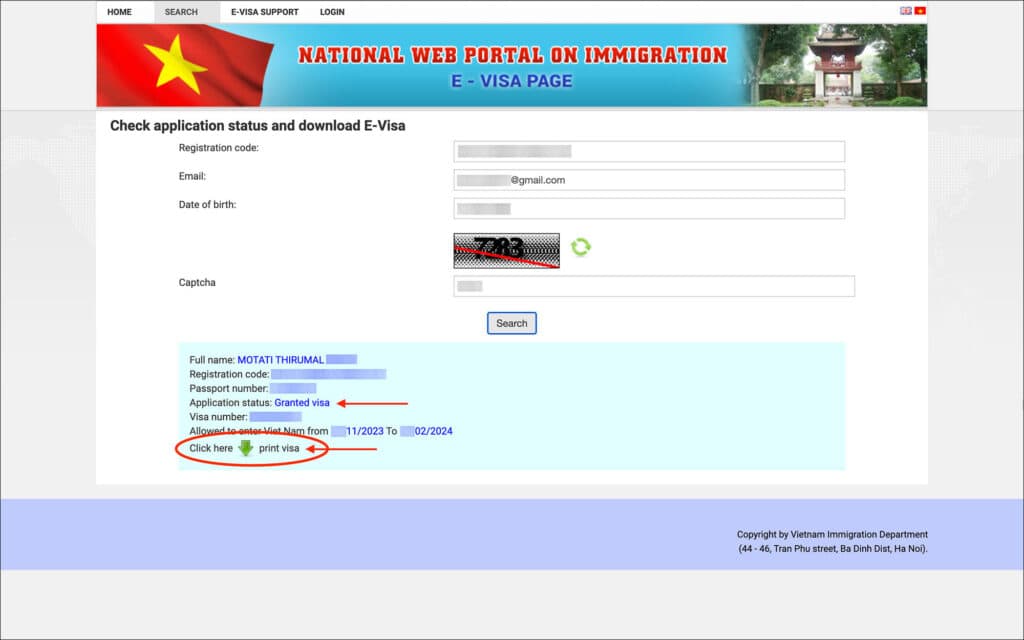
Click on the “Click here ↓ print visa” button to download your eVisa.
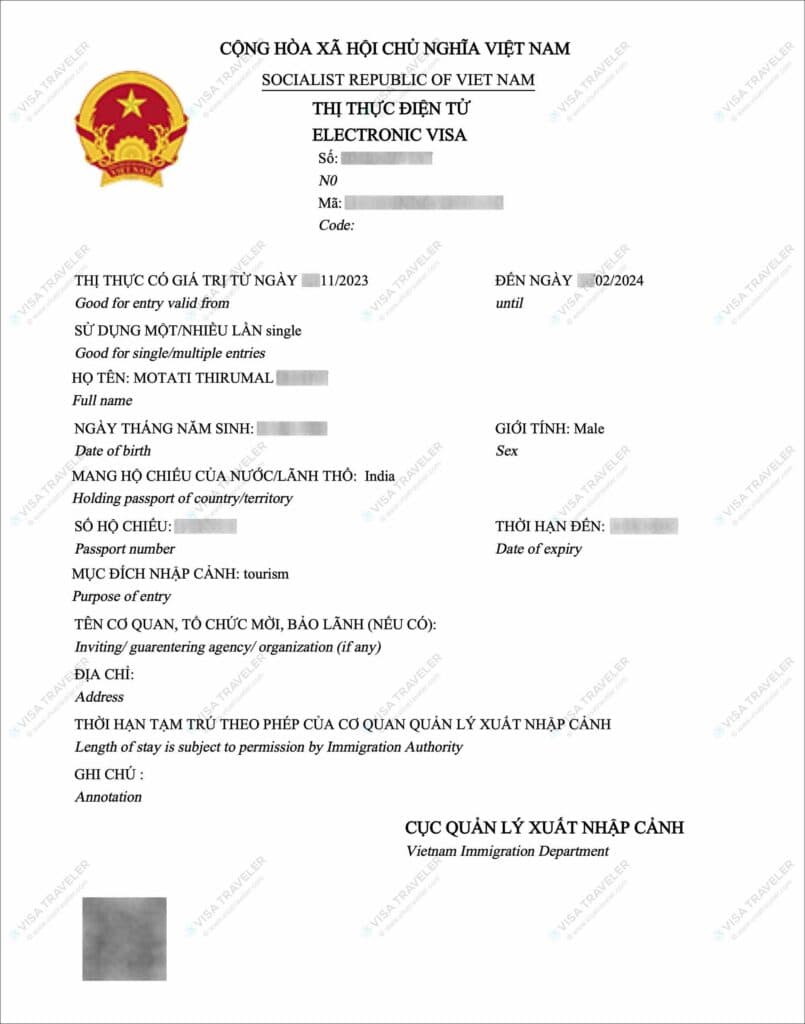
Print and carry your approved eVisa when you travel. Or download it as a PDF on your phone and show it to the airline staff or Vietnam immigration officer when asked.
***
Conclusion
That’s it, folks! Make sure to carry a print of your Vietnam eVisa when you travel.
If you are having any troubles with your Vietnam eVisa application, comment below. I will try to help.

 Is travel history important for UK visa
 How to Fill DS-160 Form for US Visa: A Step-by-Step Guide (with screenshots)
 18 VISA-FREE Countries You Can Visit with Australian Visa or PR [2024 Edition]