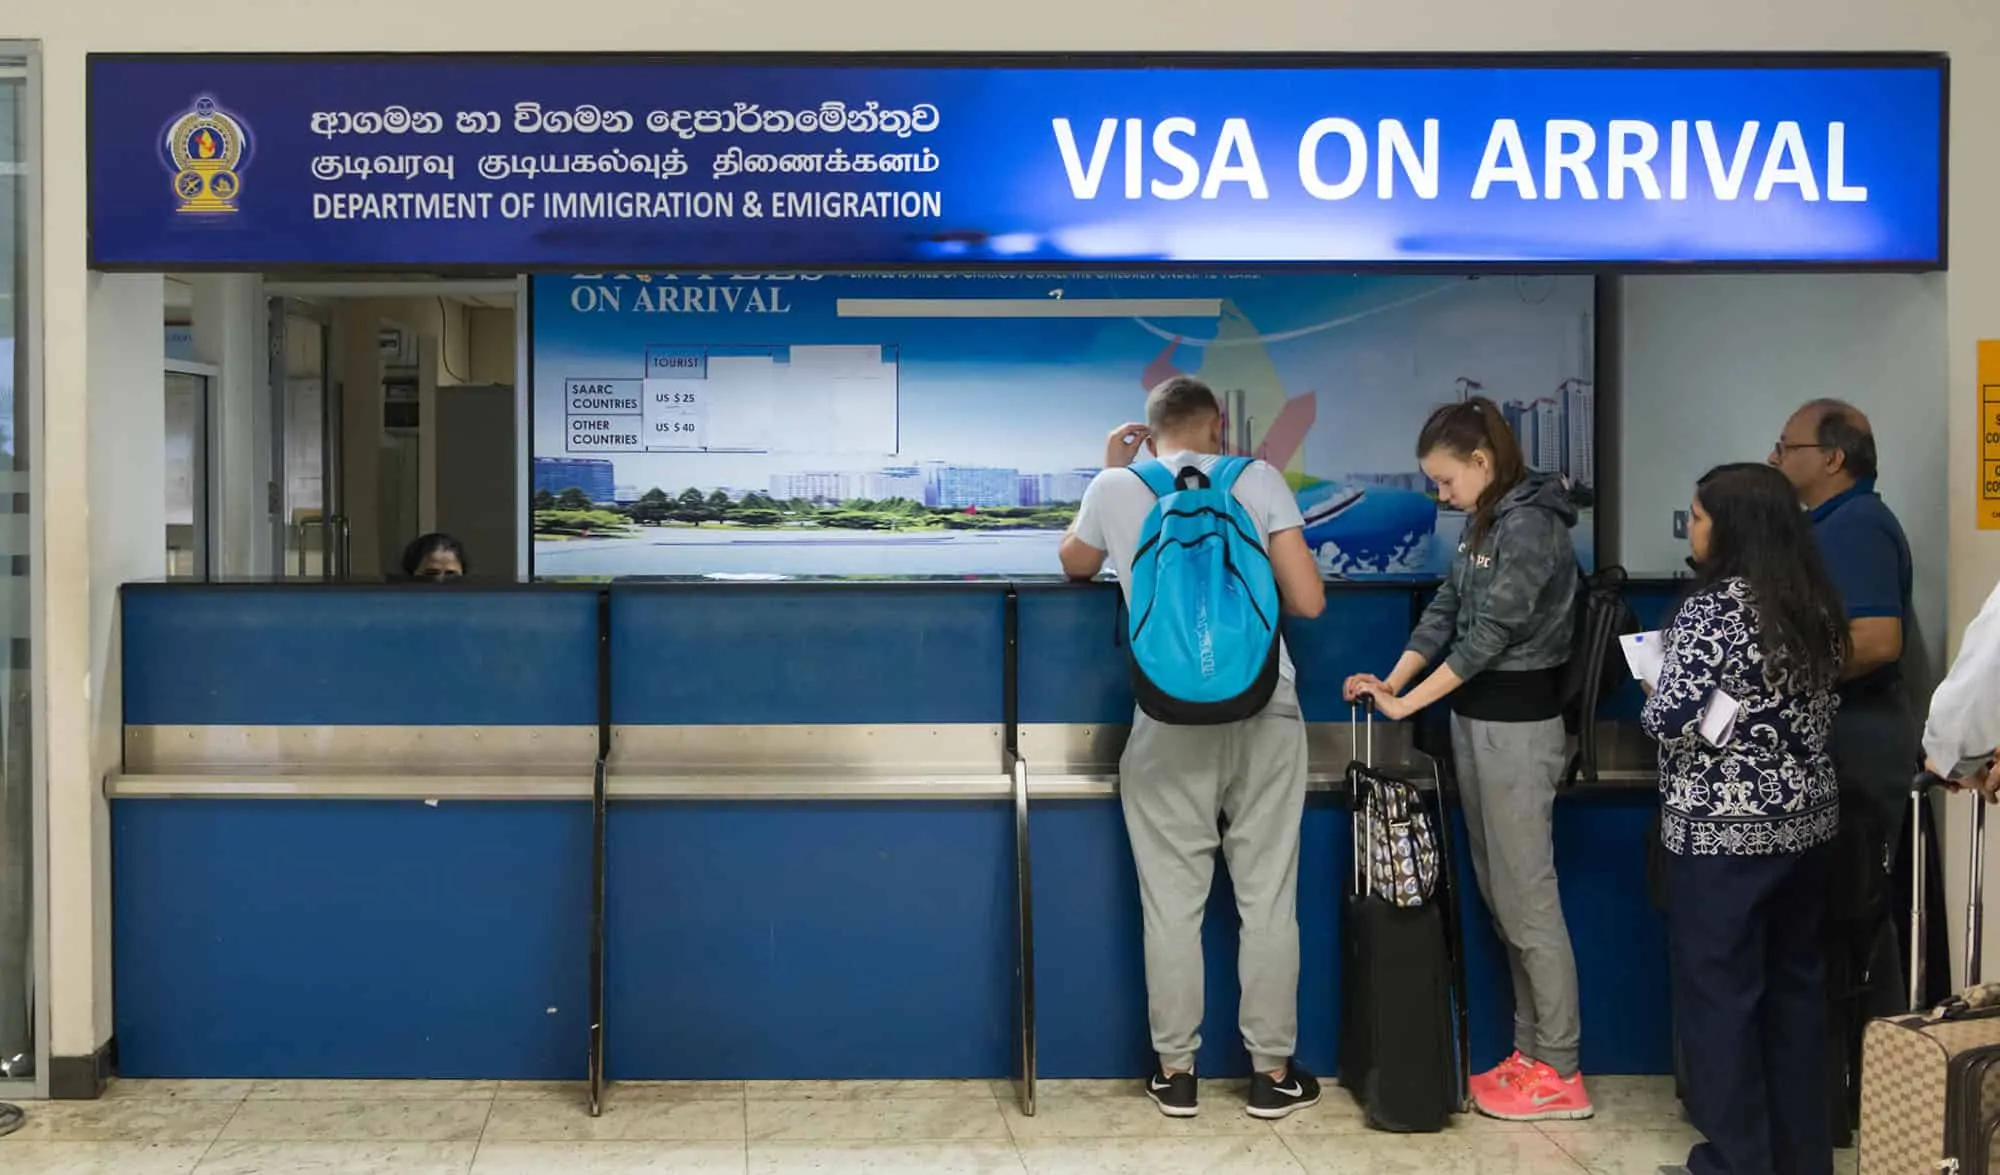
Visa on Arrival (VoA) is also a visa, but you would get the visa at the arrival airport rather than from the consulate in your home country. Visa on Arrival is also sometimes referred to as Visa upon Arrival or Landing Visa.
Since a Visa on Arrival is also a visa, you would need to have all the required documents as a regular visa. A Visa on Arrival can also be denied just like a regular visa, so you must have a backup plan in such a case.
Table of Contents
***
Should you prefer Visa on Arrival over a pre-approved visa from the consulate?
More and more countries are offering Visa on Arrival these days. Visa on Arrival is a lot more convenient. It saves time, money and trips to the consulate. Prefer Visa on Arrival –
- For short trips of 2 weeks to a month
- If there is no consulate in your city or country
***
Should you prepare ahead for your Visa on Arrival?
Visa on Arrival can be time-consuming at the airport or land border. Sometimes, you would spend 1-2 hours just in the line itself. Usually, the delays are not caused by the visa officers, but by the applicants themselves.
Most travelers arrive at the airport with no proper understanding of requirements and no prior preparation. They end up taking too much time at the counter asking questions, looking up for information on their phones, chatting with their family/friends or arguing with the visa officers.
A little bit of preparation can not only save time for you but also to your fellow travelers behind you in the line. In this article, we will go over some of the important steps to keep in mind while getting your Visa on Arrival for any country.
So, without further ado, let’s jump in.
Also Read: 10 ways to get a flight itinerary for your visa application
***
Before Travel
01. Read and understand the requirements
This is very important. Visa on Arrival is still a visa. You must carefully read and understand the requirements. You must make sure that you meet all the requirements and that you are actually eligible for Visa on Arrival.
Not complying with the requirements can get your visa denied. It’s much more difficult to manage a visa denial at the airport than at your home country. WiFi or 3G facilities are not usually available at the airport, making it difficult to figure out a workaround or an alternate plan.
Example: Thailand offers Visa on Arrival to 21 nationalities. If you are not from one of those 21 nationalities, you cannot get a Visa on Arrival.
Personal Experience: Thailand Visa on Arrival is only for 15 days. I booked a ticket in 30 days thinking that I could convince the visa officer. That was a mistake. I had to pay a premium and rebook my onward flight at the airport in order to get my Visa on Arrival.
Also Read: How to travel 50 countries VISA-FREE with US visa in 2023
—
02. Read and understand the procedure
The procedure to get a Visa on Arrival at the airport varies slightly from country to country. Though a majority of the countries follow the standard procedure, some countries have prerequisites. Read and understand the procedure to make sure you know what all needs to be done prior to and also at the airport to get the Visa on Arrival successfully.
Example: To get the Visa on Arrival in Vietnam, you must obtain an approval letter from a visa agent prior to your arrival in Vietnam. Similarly, to get a Visa on Arrival in Qatar, you must obtain an Electronic Travel Authorization (ETA) prior to your arrival in Qatar.
Personal Experience: Every time I travel to Vietnam, I see many travelers arriving at the airport without an approval letter in hand. Either they don’t have a print of the letter or don’t know anything about the approval letter at all. I see them panicking and shelling out hundreds of dollars on a visa agent for a quick one-hour approval letter.
Also Read: How to travel 38 countries VISA-FREE with Canada visa in 2023
—
03. Gather all the information needed for Visa on Arrival forms
Check out or download the online version of the Visa on Arrival forms. Go through all the fields and gather the information to be filled in. Some of the information would be personal data such as name, date of birth, nationality, passport number, etc. which you can remember easily.
Look for information such as contact person, address, phone number and number of days in the host country, employment and residential address in your home country, etc. This information cannot be remembered easily, so it makes sense to write this information down on a piece of paper or on a notepad app.
Example: The Vietnam visa application asks for information such as employment and residential address in your home country as well as the address, name and phone number of your contact in Vietnam. Having this information handy will save you a ton of time at the airport.
Personal Experience: It’s a common sight to see people at the airport digging through their emails, messages, and apps for the information to be filled in their Visa on Arrival forms. It would be handy if you could gather all the information you need upfront. Keep that information in a notepad so it’s easily accessible in the airport when you don’t have access to WiFi or 3G.
Also Read: 10 mistakes that can get your visa denied (And how to avoid them)
—
04. Download and pre-fill all the application forms to save time at the airport
If it is allowed, download all the application forms. Print and fill them out. This will not only save you time but will also spare you from digging through your phone for the information to be filled in.
Example: The Vietnam Visa on Arrival application form is downloadable. Downloading this form and filling in all the details before arriving in Vietnam can save you a ton of time at the airport.
Personal Experience: I usually download and fill out my Vietnam visa forms before my arrival at the airport. I see many travelers standing around the tables to find a place to fill their forms. Sometimes, I see people even waiting for the forms as the counters run out of forms.
Also Read: What to pack for international travel
—
05. Gather all the documents needed
Gather all the documents needed for your Visa on Arrival and print them out. This includes return flight tickets, hotel booking confirmations, bank statements, invitation letters, conference/event confirmations, etc
Keep them all together with your filled-in application forms on the top. Having all documents together spares you from any back-and-forth questions with the visa officers.
If you prefer electronic versions of your documents, make sure that the documents are available offline. When you arrive at the immigration in the airport, you will not have access to WiFi or 3G. Use a cloud service such as Google Drive or Dropbox to save the documents and make them available offline.
Example: To get a Visa on Arrival in Thailand, you would need documents such as a return flight ticket within 15 days, hotel booking confirmation, etc. These must be handed over along with the application form to the visa officers at the Visa on Arrival counters.
Personal Experience: I usually print and carry all the required documents for Visa on Arrival. Documents such as bank statements, I keep them on my phone handy so I can show it to the visa officer if asked.
Also Read: 15 ways to research visa requirements for any country
—
06. Gather the photographs needed
Gather a few copies of your passport-size photographs. Read the visa requirements again and make sure the photographs are as per the photo specifications. Some Visa on Arrival sections are equipped with photo booths but it’s not the case everywhere.
Example: Thailand Visa on Arrival requires one 4×6 cm passport-size photograph. It’s better to have a photograph of the exact size and specifications.
Personal Experience: I usually carry about 4 photographs with me. Normally, 1 or 2 are enough for the application but you never know. Having a couple of extra photographs will save you time and money when needed.
FREE eBook: How to travel 56 countries VISA-FREE with a visa from US, Canada, UK, Schengen, Australia, etc.
—
07. Get the cash needed for the visa fee
Visa on Arrival fee must be paid in the host country’s currency or sometimes in USD. ATMs are usually not available at the Visa on Arrival sections. Even if they are available, they are usually broken or do not work.
Currency exchanges are usually available at the Visa on Arrival sections. If you do not have the local currency on you, you can exchange USD easily. Major currencies such as EUR or GBP can also be exchanged.
Find out the visa fee and get the cash in the host country’s currency or USD.
Example: Visa fee for Thailand Visa on Arrival is 2,000 THB which can be paid only in Thai Baht (THB).
Personal Experience: Though the requirements are displayed everywhere, I quite often see people trying to pay in their own home currency or with a credit card at the Visa on Arrival sections in Thailand. When they are told by the visa officers that the fee can be paid only in Thai Baht, they panic and cause inconvenience to everyone.
***
At the Airport or Land Border
08. Look for the signs and follow the procedure
When you arrive at the airport/land border, just keep walking along with everyone towards the immigration and customs. When you arrive at the immigration and customs, look for the Visa on Arrival or Visa upon Arrival or Landing Visa section.
Grab and fill out all the forms needed. Stand in the line and wait for your turn. When you are at the counter, hand over your passport, forms, photos, and payment.
Depending on the country and airport, there may be multiple counters and multiple steps. You may need to hand over the documents at one counter, make payment at another and finally pick up your passport at a different counter.
You will be called by token or name to pick up your passport. Once you pick up your passport, immediately check for the visa sticker. Make sure all the details are correct including the expiration date.
—
09. Go through the immigration and customs as usual
After you pick up your passport, proceed to immigration and customs. Your passport and visa will be verified and an entry stamp will be issued. Again check the dates on the entry stamp before you leave the immigration. If you were given a departure card, retain that card until you leave the country. A departure card is required to exit the country.
***
Conclusion
There you have it! Everything you need to know about Visa on Arrival. And, the important steps that will help you get Visa on Arrival successfully.
Have you ever secured a Visa on Arrival in any country? Let me know your experience in the comments below.

 Onward Ticket Review: Fastest Way to Get an Onward Ticket in 2023?
 How to Book Flight Tickets with FREE Cancellation within 24 Hours on Orbitz: A Step-by-Step Guide
 How to book onward ticket: A step-by-step guide