This article is a complete guide to obtaining India e-Visa as a tourist. You can learn everything about India e-Visa types, requirements, eligibility, documents needed, fee and application procedure.
India e-Visa is quite easy to apply. All you need is a photo, a scan of your passport ID page and a credit/debit card. It takes about 15 minutes to fill out the application and the processing takes about 72 hours.
India e-Visas are issued for tourism, business and medical purposes. The e-Visa for tourism is called e-Tourist Visa. In this article, we will focus on e-Tourist Visa and we will refer to it as simply India e-Visa.
Currently, about 166 nationalities are eligible to apply for India e-Visa online. Indian e-Visa can be double-entry or multiple-entry and can be valid from 30 days to 5 years.
Indian e-Visa is also sometimes unofficially referred to as “India visa online” or “online visa India”.
Table of Contents

BONUS: FREE eBOOK
Enter your name and email to download the FREE eBOOK: The Secret to VISA-FREE Travel
***
INDIA E-VISA REQUIREMENTS FOR TOURISTS
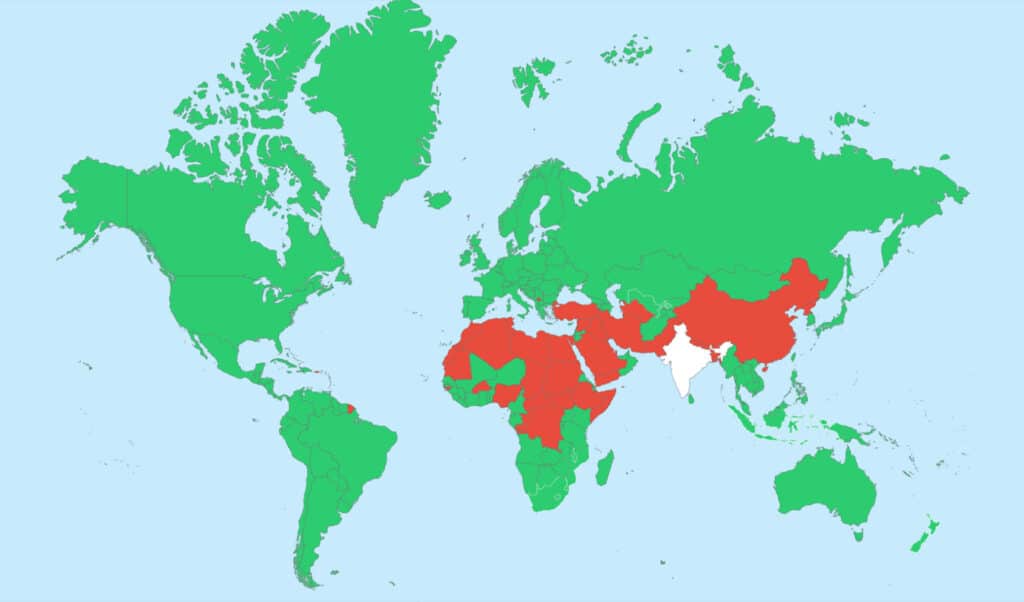
Who is eligible to apply for India e-Visa?
The following 166 nationalities are eligible to apply for India e-Visa.
- Afghanistan
- Albania
- Andorra
- Angola
- Anguilla (British Territory)
- Antigua and Barbuda
- Argentina
- Armenia
- Aruba
- Australia
- Austria
- Azerbaijan
- Bahamas
- Barbados
- Belarus
- Belgium
- Belize
- Benin
- Bolivia
- Bosnia and Herzegovina
- Botswana
- Brazil
- Brunei
- Bulgaria
- Burundi
- Cambodia
- Cameroon
- Canada
- Cape Verde
- Cayman Island (British Territory)
- Chile
- Colombia
- Comoros
- Cook Islands
- Costa Rica
- Cote d’Ivoire
- Croatia
- Cuba
- Cyprus
- Czech Republic
- Denmark
- Djibouti
- Dominica
- Dominican Republic
- Ecuador
- El Salvador
- Equatorial Guinea
- Eritrea
- Estonia
- Eswatini
- Fiji
- Finland
- France
- Gabon
- Gambia
- Georgia
- Germany
- Ghana
- Greece
- Grenada
- Guatemala
- Guinea
- Guyana
- Haiti
- Honduras
- Hungary
- Iceland
- Indonesia
- Ireland
- Israel
- Italy
- Jamaica
- Japan
- Jordan
- Kazakhstan
- Kenya
- Kiribati
- Kyrgyzstan
- Laos
- Latvia
- Lesotho
- Liberia
- Liechtenstein
- Lithuania
- Luxembourg
- Madagascar
- Malawi
- Malaysia
- Mali
- Malta
- Marshall Islands
- Mauritius
- Mexico
- Micronesia
- Moldova
- Monaco
- Mongolia
- Montenegro
- Montserrat (British Territory)
- Mozambique
- Myanmar
- Namibia
- Nauru
- Netherlands
- New Zealand
- Nicaragua
- Niger
- Niue
- North Macedonia
- Norway
- Oman
- Palau
- Palestine
- Panama
- Papua New Guinea
- Paraguay
- Peru
- Philippines
- Poland
- Portugal
- Romania
- Russia
- Rwanda
- St Kitts and Nevis
- St Lucia
- St Vincent and the Grenadines
- Samoa
- San Marino
- Senegal
- Serbia
- Seychelles
- Sierra Leone
- Singapore
- Slovakia
- Slovenia
- Solomon Islands
- South Africa
- South Korea
- Spain
- Sri Lanka
- Suriname
- Sweden
- Switzerland
- Taiwan
- Tajikistan
- Tanzania
- Thailand
- Timor-Leste
- Togo
- Tonga
- Trinidad and Tobago
- Turks and Caicos Islands (British Territory)
- Tuvalu
- Uganda
- Ukraine
- United Arab Emirates
- United Kingdom
- United States
- Uruguay
- Uzbekistan
- Vanuatu
- Vatican City
- Venezuela
- Vietnam
- Zambia
- Zimbabwe
—
What is the validity of India e-Visa?
India e-Visas are valid for 30 days,1 year or 5 years. You can select the validity that works best for your purpose while filling out the e-Visa application.
To summarize, below are the various validity options available for Indian e-Visa.
| India e-Visa Type | e-Visa Validity |
| 30-Day e-Tourist Visa | 30 days from the date of issue |
| 1-Year e-Tourist Visa | 1 year from the date of issue |
| 5-Year e-Tourist Visa | 5 years from the date of issue |
—
How many days can you stay in India on e-Visa?
On a 30-day e-Visa, you can stay up to 30 days. On a 1-year or 5-year e-Visa, you can stay up to 90 days from the day of arrival.
Canada, Japan, UK and US nationals holding 1-year or 5-year e-Visas can stay up to 180 days on each visit.
Below is the summary of permitted stay for each of the available Indian e-Visas.
| India e-Visa Type | Permitted Stay |
| 30-Day e-Tourist Visa | 30 days |
| 1-Year e-Tourist Visa | 90 days |
| 5-Year e-Tourist Visa | 90 days |
| Canada, Japan, UK or US nationals holding 1-Year or 5-Year e-Tourist Visa | 180 days |
IMPORTANT
Irrespective of nationality, the total stay in India on an e-Visa cannot be more than 180 days in a calendar year.
—
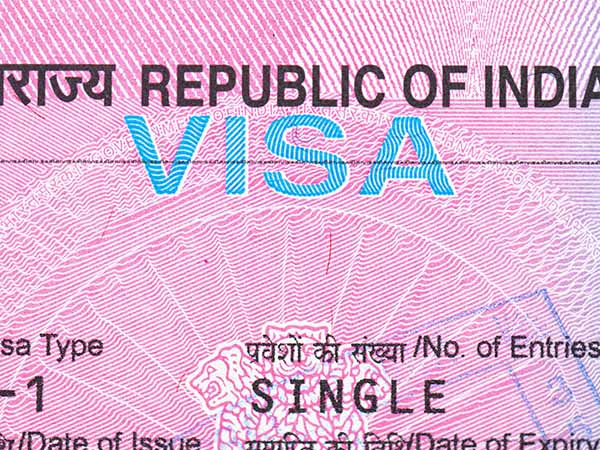
How many times can you enter India on e-Visa?
30-day e-Visas are double-entry visas. That means you can enter India on a 30-day e-Visa twice.
1-year and 5-year e-Visas are multiple entries, meaning you can enter India as many times as you want.
Keep in mind that your total stay in India cannot exceed 180 days in a given calendar year.
Below is the summary of various e-Visas and their permitted entries.
| India e-Visa Type | Entries Permitted |
| 30-Day e-Tourist Visa | Double-entry |
| 1-Year e-Tourist Visa | Multiple-entry |
| 5-Years e-Tourist Visa | Multiple-entry |
—
When can you enter India on e-Visa?
You can enter India anytime during the validity of your e-Visa. Depending on your nationality and e-Visa type, you will be given 30-day or 90-day entry (or 180-day entry if you are a Canada, Japan, UK or US national).
Even if you enter India on the last day of your visa validity, you will still be given 30 or 90 days of entry depending on the e-Visa type you hold.
—
When should you apply for India e-Visa?
For 1-year and 5-year e-Visas, you can apply up to 120 days in advance. For 30-day e-Visas, you can apply up to 30 days in advance.
The latest you can apply is 4 days. So if you have less than 4 days, your application will not be accepted.
Below is the summary of various e-Visas and the earliest or latest you can apply for those visas.
| E-Visa Type | Earliest you can apply | Latest you can apply |
| 30-Day e-Tourist Visa | 30 days | 4 days |
| 1-Year e-Tourist Visa | 120 days | 4 days |
| 5-Year e-Tourist Visa | 120 days | 4 days |
—
Which airports or land borders you can enter India from using e-Visa?
You can enter India on an e-Visa at the following 29 airports and 5 seaports. Details are below.
Airports (29)
- Ahmedabad
- Amritsar
- Bagdogra
- Bengaluru
- Bhubaneshwar
- Calicut
- Chennai
- Chandigarh
- Cochin
- Coimbatore
- Delhi
- Gaya
- Goa
- Guwahati
- Hyderabad
- Jaipur
- Kannur
- Kolkata
- Lucknow
- Madurai
- Mangalore
- Mumbai
- Nagpur
- Port Blair
- Pune
- Tiruchirapalli
- Trivandrum
- Varanasi
- Visakhapatnam
Seaports (5)
- Cochin
- Goa
- Mangalore
- Chennai
- Mumbai
Land border (0)
Currently, e-Visa holders are NOT ALLOWED to enter India via land borders.
NOTE
You cannot enter India via the land border using an e-Visa. But you can exit or depart from India from any airport, seaport or land border.
IMPORTANT
It is NOT MANDATORY to enter India from the airport or seaport that you have mentioned in your e-Visa application. You CAN enter India from any of the above 29 airports or 5 seaports using your e-Visa.
—
What is the minimum passport validity required for India e-visa?
Your passport must be valid for at least 6 months from your anticipated date of arrival in India. Add 6 months to your expected date of arrival in India to calculate the passport validity required for your e-Visa application.
Here is an example.
- Say today is May 01, 2023
- Your anticipated date of arrival in India is June 01, 2023
- To apply for your e-Visa, your passport must be valid at least until December 01, 2023
—
What are the documents needed for India e-Visa?
The following documents are needed for India e-Visa.
- Original passport
- Digital passport-size photo with the following specifications
- Photo must be in JPG/JPEG format only
- Photo must be 2inch x 2inch in dimensions
- Photo must be less than 1MB in size
- Head must be centered with light background and no glasses
- Scan of your passport data/ID page
- Scan must be in PDF format only
- Scan must be larger than 10KB and smaller than 300KB
- Credit or debit for visa fee payment
- Your credit or debit card must support international transactions in non-home currency
—
What are the India e-Visa photo requirements?
You need one digital photo for your India e-Visa application. The digital photograph must meet the following specifications.
- The photograph must be in JPG/JPEG format only
- Photo must be 2inch x 2inch in dimensions
- The photo must be less than 1MB in size
- Head must be centered with light background and no glasses
—
What is the current India e-Visa fee?
The visa fee for India e-Visa varies depending on the visa type and country. Below is the general fee structure for various tourist e-Visa types.
| E-Visa Type | Visa fee |
| 30-day e-Tourist Visa (April – June) | $10 USD |
| 30-day e-Tourist Visa (July – March) | $25 USD |
| 1-year e-Tourist Visa | $40 USD |
| 5-year e-Tourist Visa | $80 USD |
Irrespective of the tourist e-Visa type, there is no visa fee for Argentina, Cook Islands, Fiji, Indonesia, Jamaica, Kiribati, Marshall Islands, Mauritius, Micronesia, Myanmar, Nauru, Niue Island, Palau, Papua New Guinea, Samoa, Seychelles, Solomon Islands, South Africa, Tonga, Tuvalu, Uruguay and Vanuatu. The visa fee for these countries is gratis.
—
What is the current India e-Visa processing time?
The India e-Visa processing time is 72 hours. In most cases, the applications are processed within 48 hours.
***
INDIA E-VISA APPLICATION PROCESS
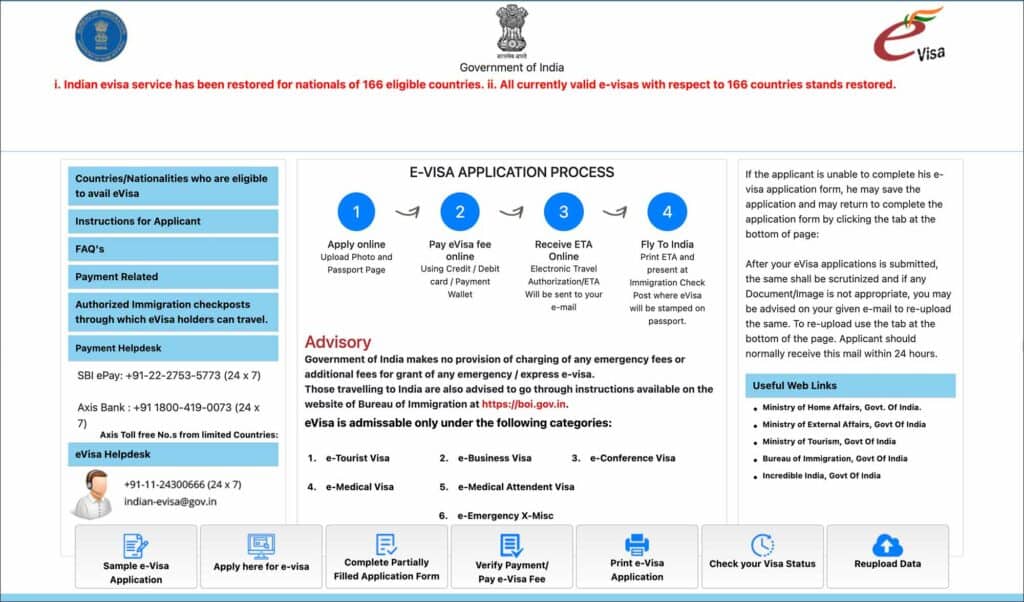
How to apply for India e-Visa?
You can start your application process by filling out the online application on the India e-Visa portal. Make sure to keep all the required documents ready before starting the application.
Filling out the entire online application may take about 15 minutes. You can also save the partially filled application and come back to it at a later point in time.
If you haven’t, check out the step-by-step guide on applying for India e-Visa for details on how to complete the online application, track the status and receive your approved e-Visa.
RELATED: How to apply for India e-Visa in 2023: A step-by-step guide
—
Word of caution on India e-Visa fake websites
If you search on the internet, you will see that there are many Indian e-Visa websites posing as “official websites”. There is ONLY one Indian e-Visa OFFICIAL website. The rest are all fake. The OFFICIAL website is below.
India e-Visa OFFICIAL website: https://indianvisaonline.gov.in/evisa/
—
How to track India e-Visa application?
You can track your application status on the India e-Visa portal using your Application ID and passport number.
On the application status page, your application will have one of the below two statuses.
- SUCCESSFULLY RECEIVED: Your application is still in the process
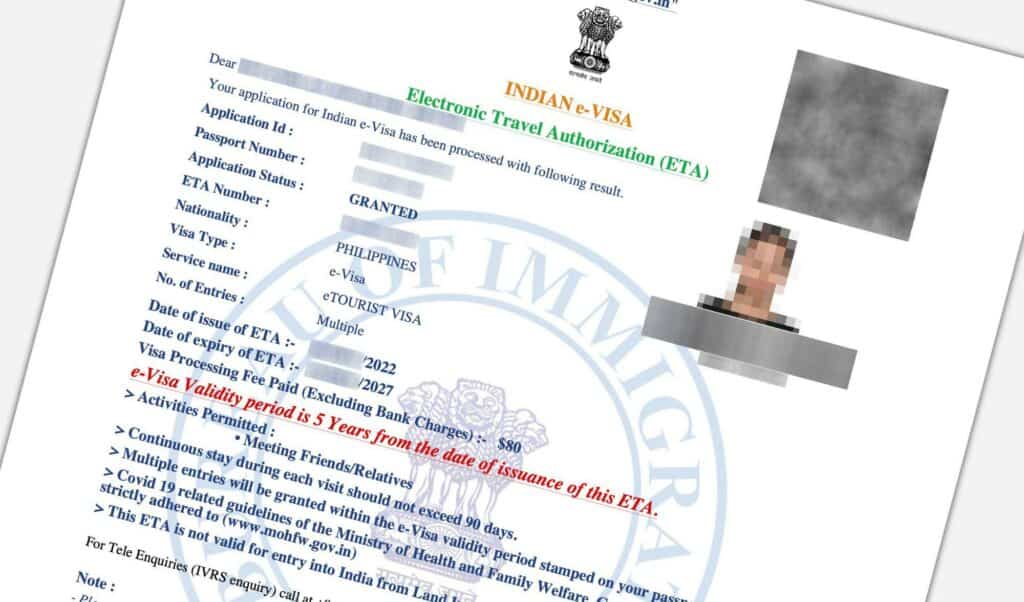
- GRANTED: Your India e-Visa is approved
—
How to receive the approved India e-Visa?
When your India e-Visa is approved, you will be notified via email that your e-Visa has been granted.
You can download your approved e-Visa from the India e-Visa portal using your Application ID and passport number.
On the application status page, click on the “Print Status” button to download your approved e-Visa.
You must print and carry your approved Inda e-Visa PDF when you travel. You can also download it as a PDF on your phone and show it to the airline staff or India immigration officer on your arrival.
—
Is there a priority service for India e-Visa?
Unfortunately, there is no priority visa processing. The e-Visa process takes up to 72 hours. If you haven’t received your visa result even after 72 hours, you must contact the India e-Visa department at their email or phone listed below.
—
How to contact India e-Visa customer service?
In case of questions on your visa status, you can contact the e-Visa department at their email and phone numbers.
EMAIL: indian-evisa@gov.in
PHONE: +91 11 24300666

 India tourist visa from the embassy in 2023: A complete guide
 India Visa on Arrival for Tourists in 2023: A complete guide
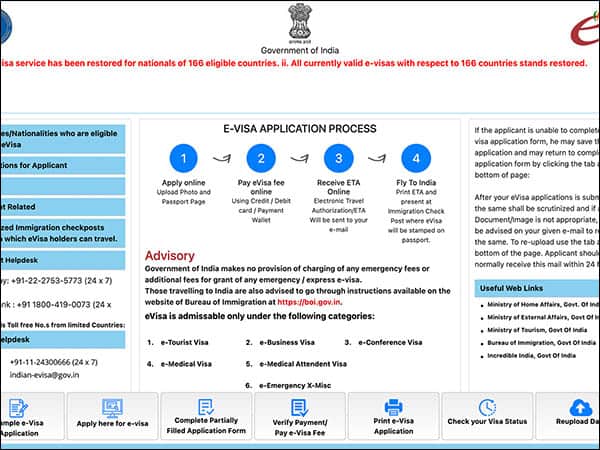 How to apply for India e-Visa: A step-by-step guide (with screenshots)